Follow Me On Social Media!

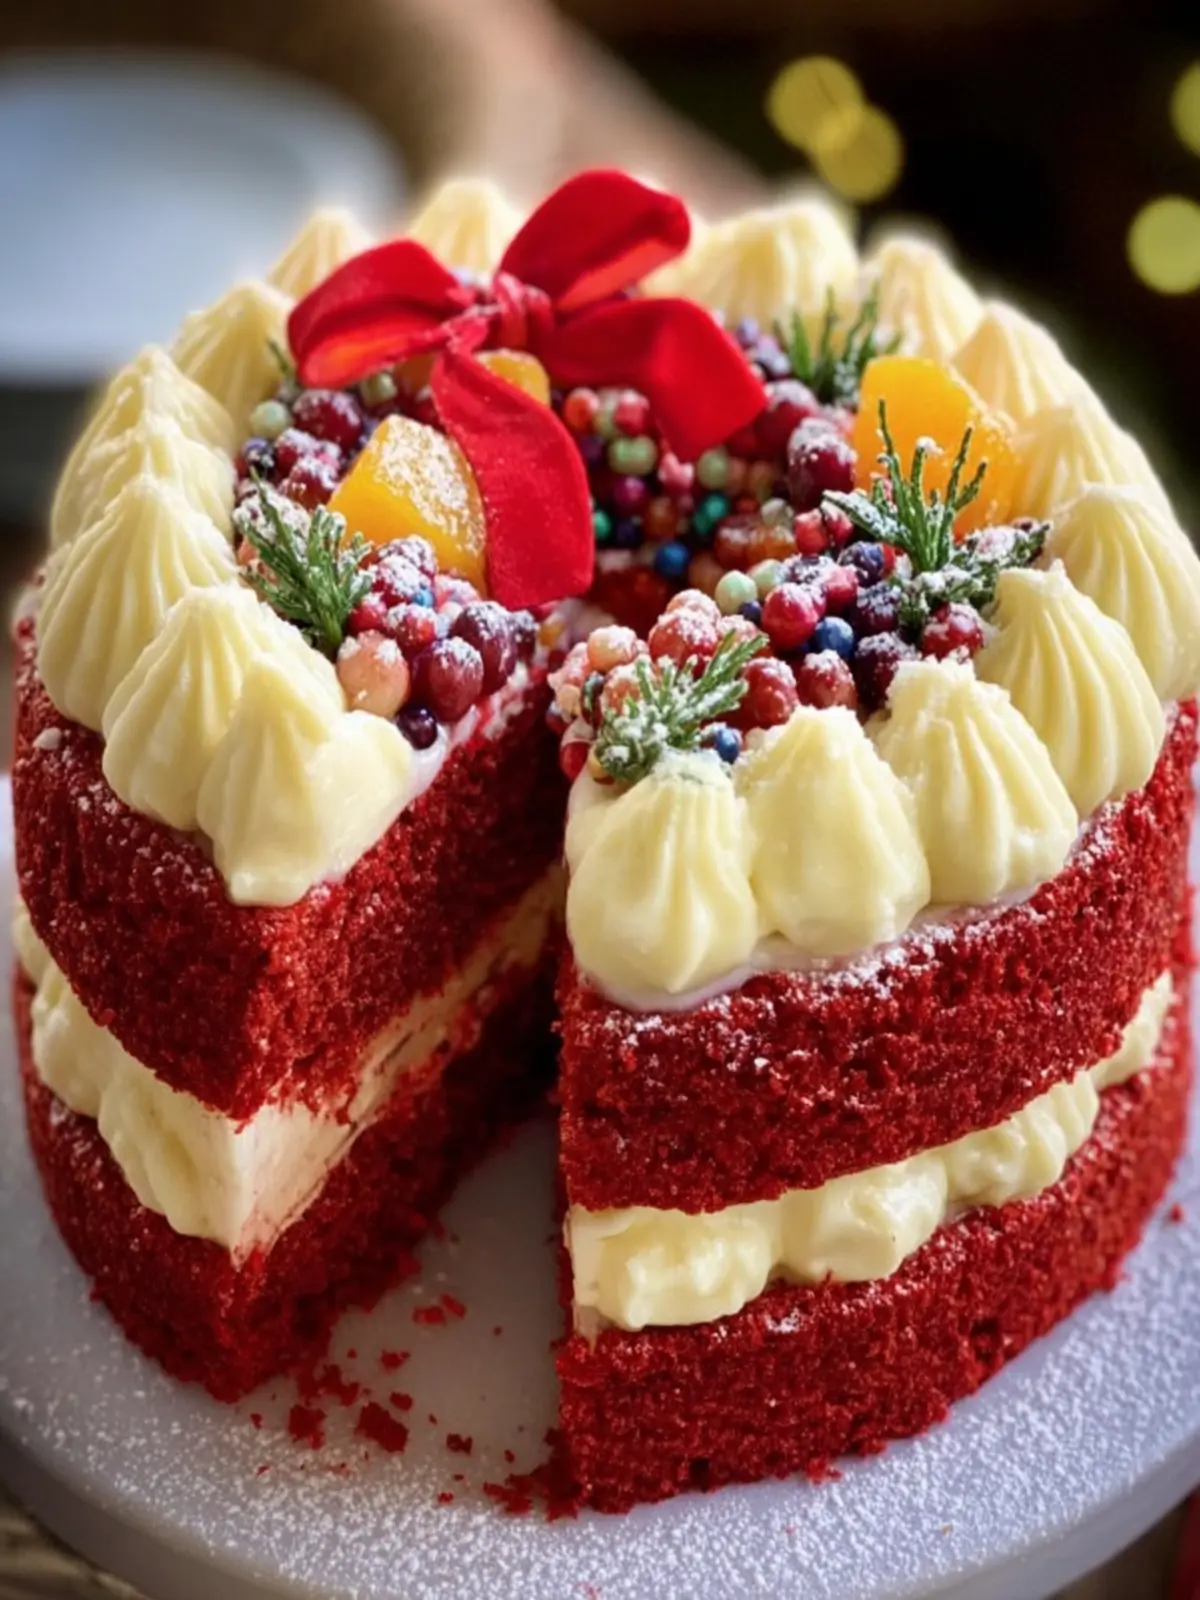
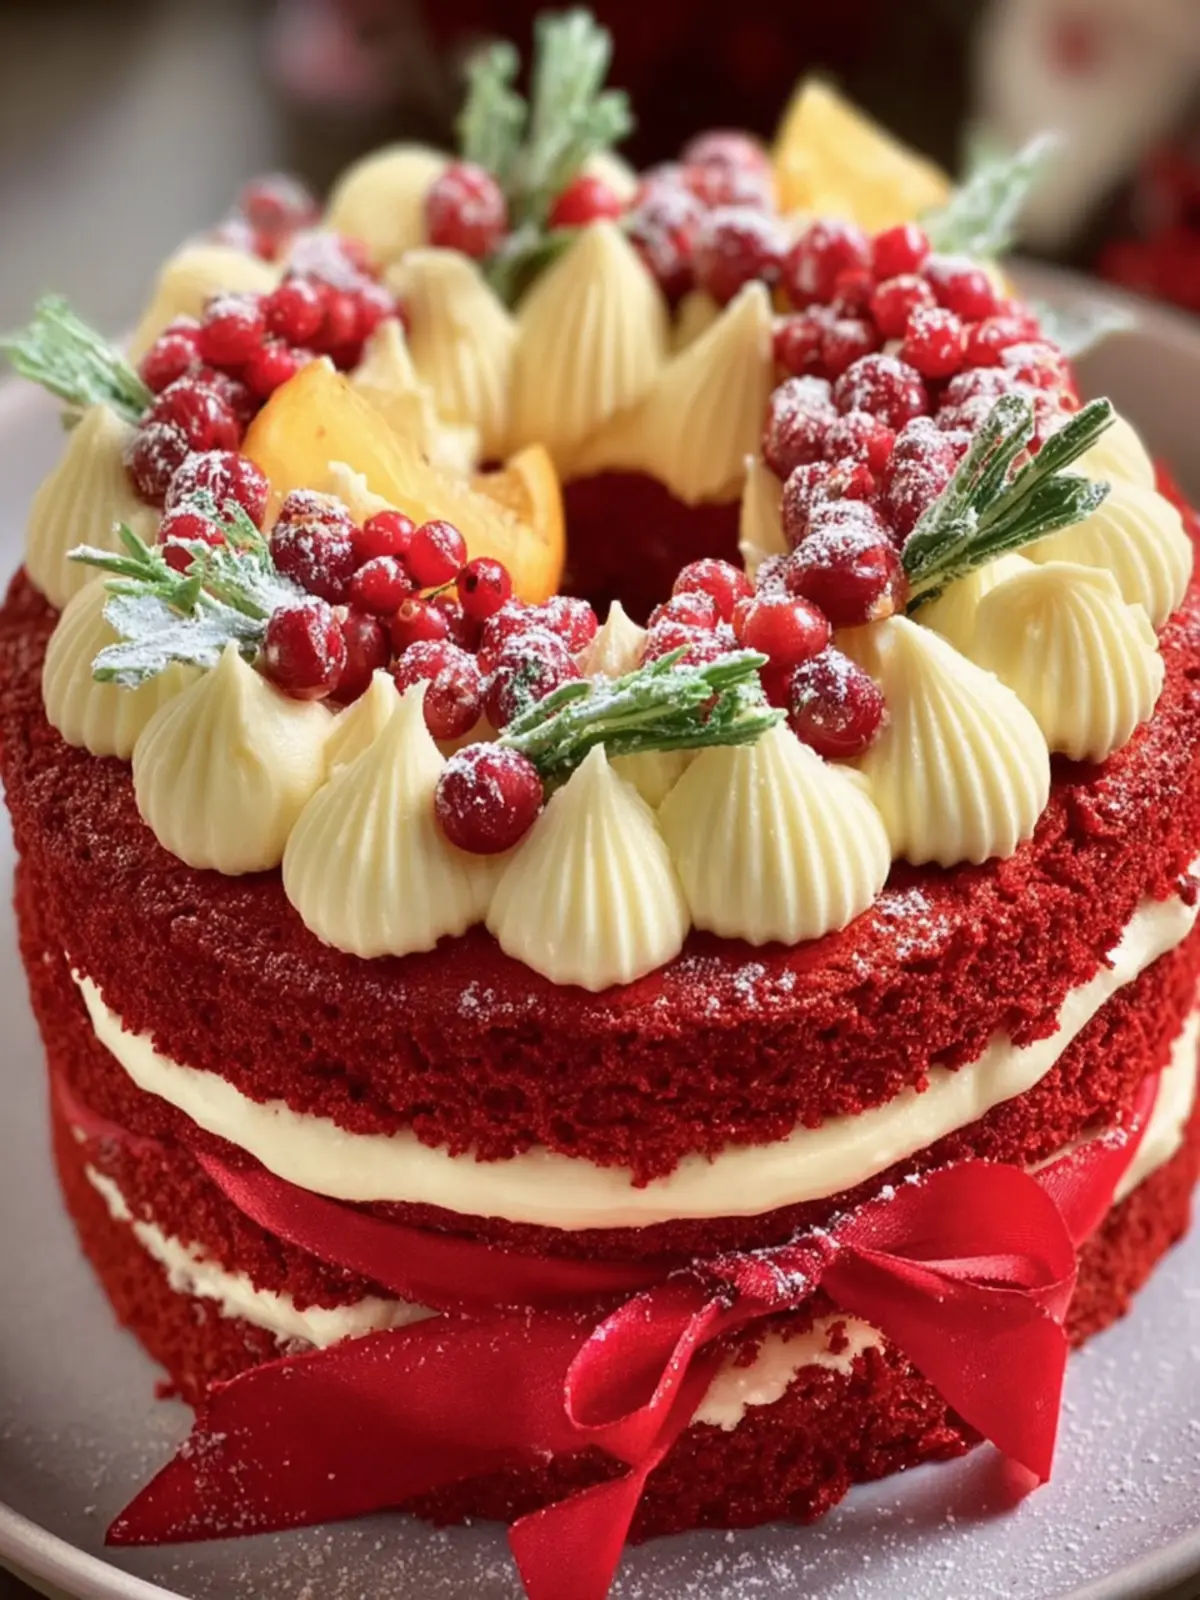
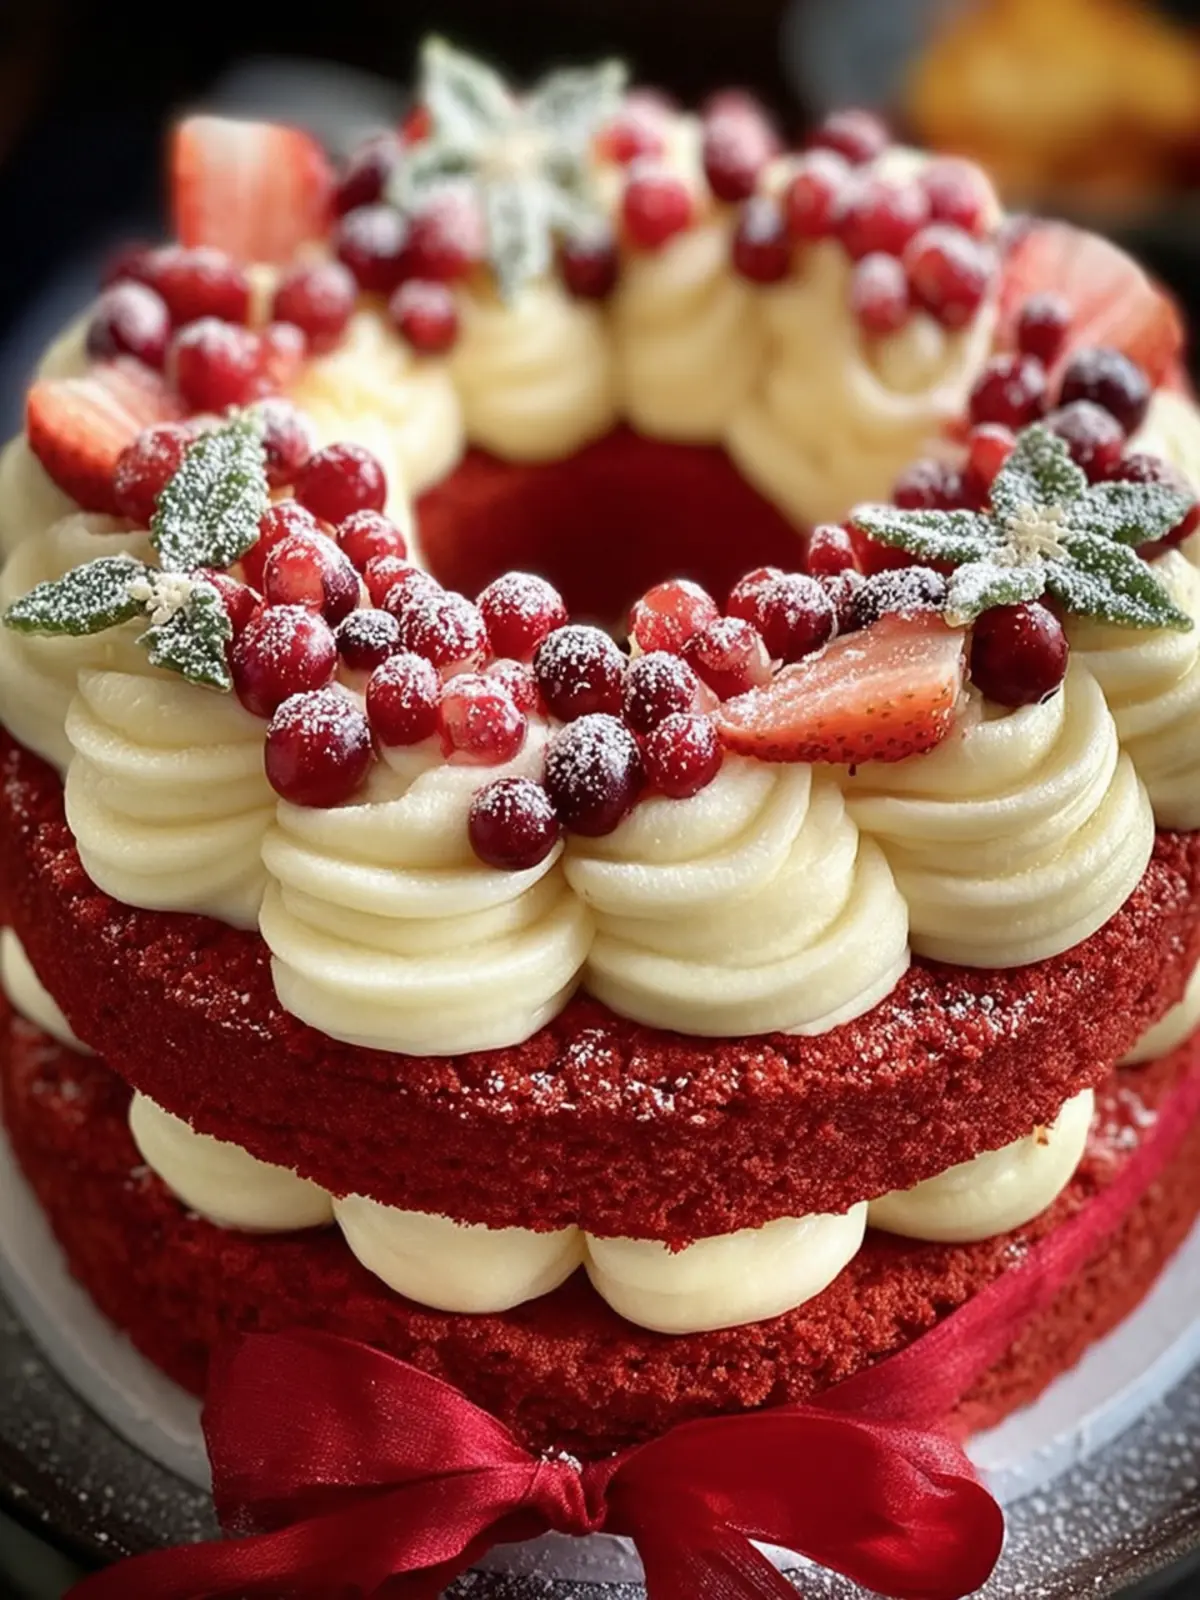
Festive Red Velvet Holiday Cake: Irresistibly Moist & Cheerful
Introduction to Festive Red Velvet Holiday Cake
The festive red velvet holiday cake is more than just a dessert; it’s a celebration wrapped in rich, velvety layers that bring warmth and joy to any gathering. Picture this: as the chilly winter air sets in and the holiday lights twinkle, your home fills with the tempting aroma of baking. This cake is not just about being visually stunning with its vibrant crimson hue; it’s a delightful blend of flavors and textures that come together to create the perfect holiday treat.
What makes this cake a holiday favorite?
This beloved cake features a unique combination of subtle cocoa flavor and a slight tang from buttermilk, all balanced beautifully by its signature cream cheese frosting. The bold red, reminiscent of festive cheer, makes it a centerpiece for any holiday table. Whether you’re hosting a gathering or bringing a dish to a family get-together, this cake sparks joy and craving with just one look.
Imagine slicing into the soft, moist layers, revealing the contrast of the deep red against the luscious white frosting. Each bite is a sweet reminder of shared moments and hearty laughter. It’s ideal for any occasion during the holiday season, whether you are celebrating Christmas, New Year, or even a cozy gathering among friends.
Making this festive red velvet holiday cake doesn’t have to be overwhelming, even for novice bakers. With simple yet high-quality ingredients and straightforward steps, you’ll find that the process is just as enjoyable as the result. Why not surprise your friends and family with a slice of this indulgent treat that captures the spirit of the holidays? Let’s whip up this delightful dessert that will not only satisfy your sweet tooth but also create cherished memories around the table.
In the following sections, we’ll break down the key ingredients, ensuring you have everything you need for this festive baking adventure.
Key Ingredients for Festive Red Velvet Holiday Cake
Creating a festive red velvet holiday cake goes beyond just mixing ingredients; it’s about harnessing the essence of the season. Each component plays a vital role in building that perfect balance of flavor and texture, making your cake a standout centerpiece for any celebration.
All-Purpose Flour
All-purpose flour is the backbone of this cake, providing structure without being too heavy. It ensures a tender crumb, allowing the red velvet to shine through.
Granulated Sugar
Granulated sugar adds sweetness and helps create that desirable moist texture. It caramelizes beautifully during baking, enhancing the cake’s rich flavor.
Vegetable Oil
Using vegetable oil instead of butter keeps the cake moist and tender. It’s an unsung hero that allows the cake to stay fresh longer while giving it a lovely, light bite.
Buttermilk
Buttermilk not only adds a tangy flavor but also reacts with baking soda, giving your festive red velvet holiday cake the lift it needs to rise perfectly.
Red Food Coloring
The iconic bright red hue of red velvet cake comes from red food coloring. It’s a critical detail that adds to the cake’s festive appeal, making it visually stunning.
Cocoa Powder
A small amount of cocoa powder is essential for that hint of chocolate, enhancing the flavor profile without overpowering the classic red velvet taste.
Eggs
Eggs bring the mixture together. They add moisture and richness while helping the cake rise, ensuring a lovely, fluffy texture.
Cream Cheese
Cream cheese is used to create the beloved frosting that pairs beautifully with red velvet. Its tanginess balances the sweetness, making each slice memorable.
Unsalted Butter
Unsalted butter is preferred for frosting to control the saltiness. It creates a creamy, luscious texture that complements the cake’s flavors perfectly.
Fresh Berries
Top your cake with fresh berries for a burst of color and a tart contrast to the sweetness. They not only beautify your presentation but also elevate the overall taste experience.
With these ingredients in hand, you’re on the path to creating a festive red velvet holiday cake that will impress your holiday guests. Happy baking!
Why You’ll Love This Festive Red Velvet Holiday Cake
There’s something magical about a festive red velvet holiday cake that instantly transforms any gathering into a celebration. Imagine walking into a warm, inviting kitchen, the aroma of baked goods wafting through the air, only to find this stunning cake stealing the show at the center of the table. Its deep red hue is not only visually striking but serves as a delicious reminder of the holiday spirit.
This cake isn’t just about looks; it offers a rich and moist texture that melts in your mouth with every bite. The balance of sweet cream cheese frosting against the subtle cocoa flavor will have your taste buds dancing with joy. When served at holiday parties, it’s sure to spark conversation and compliments, making you the star baker among your friends and family.
What truly sets this cake apart is its versatility. Whether you’re celebrating Christmas, New Year’s, or any festive occasion, the festive red velvet holiday cake pairs perfectly with a cup of coffee or hot cocoa. Plus, it’s a wonderful dessert to share, creating moments of joy and togetherness. So grab your apron, and let’s make this holiday season unforgettable together with a slice of this delightful cake!
Tips for Making the Perfect Festive Red Velvet Holiday Cake
Creating a festive red velvet holiday cake is an exciting way to celebrate the season, evoking warmth and joy with its vibrant color and rich flavor. To ensure your cake stands out, consider these helpful tips:
Use Quality Ingredients
The quality of your ingredients matters immensely. Choose high-quality cocoa powder and food coloring for the richest flavor and the deepest red. Don’t skimp on butter either; it adds a luscious texture that elevates your cake.
Measure Accurately
Baking is a science, so accurate measurements are essential. Invest in a kitchen scale for your dry ingredients! This will prevent any mishaps and help achieve that perfect balance in flavor and texture.
Let the Ingredients Reach Room Temperature
Before you begin, allow your butter and eggs to reach room temperature. This step ensures that they mix more evenly, resulting in a smoother batter.
Don’t Overmix the Batter
Overmixing can lead to a dense cake. Mix just until the ingredients are combined for a light and fluffy texture. Remember, lumps are okay!
Fill the Pans Evenly
To achieve an even bake, fill your cake pans with the same amount of batter. Using a kitchen scale can help here too, ensuring an equal distribution.
Let it Cool Properly
After baking, allow your cakes to cool in the pans for about 10 minutes before transferring them to a wire rack. This helps maintain moisture and prevents sticking.
These simple tips will set you on the path to mastering your festive red velvet holiday cake. Happy baking!
Time Details for Festive Red Velvet Holiday Cake
Baking a festive red velvet holiday cake is not just about the ingredients but also about timing. Each minute counts toward that perfect, velvety slice of heaven on your holiday table.
Preparation time
Set aside about 30 minutes to gather your ingredients and whip up that delightful batter. This includes allowing your eggs and butter to reach room temperature, which ensures a smooth, luscious mix.
Baking time
Once your cake is in the oven, you’ll need approximately 25 to 30 minutes of baking time. This is when the irresistible aroma fills your kitchen, making it hard to resist peeking!
Total time
In total, you’re looking at roughly 1 hour for creating this masterpiece from start to finish. Perfect for a cozy evening of baking or an elegant holiday gathering!
Nutritional Information for Festive Red Velvet Holiday Cake
When crafting your festive red velvet holiday cake, understanding the nutritional breakdown can help you fully enjoy this delightful treat. Whether you’re celebrating a seasonal occasion or simply indulging in a comforting dessert, here’s what you can expect:
Calories
One slice of this decadent cake packs approximately 350 calories. Its luscious cream cheese frosting and velvety texture make it a holiday favorite.
Protein
Each slice contains about 4 grams of protein. While cake isn’t typically your go-to source for protein, the inclusion of eggs adds a nice boost.
Sodium
In total, a slice of this cake has around 300 mg of sodium. This keeps the flavors balanced and enhances that rich taste without overwhelming sweetness.
Enjoying a slice of festive red velvet holiday cake can be a delightful way to celebrate the season while still being mindful of your nutritional intake!
FAQs about Festive Red Velvet Holiday Cake
Baking a festive red velvet holiday cake can be a joyous experience, filled with vibrant colors and rich flavors. However, you may have questions about making this iconic dessert perfect for your celebrations. Here are some frequently asked questions to help you enhance your baking journey.
Can I make this cake in advance?
Absolutely! You can bake the festive red velvet holiday cake up to two days ahead. Just ensure it cools completely before wrapping it in plastic wrap to maintain its moisture. For even better results, store the wrapped cake in the refrigerator.
What if I don’t have buttermilk?
No buttermilk? No problem! You can easily make a substitute by combining one cup of milk with one tablespoon of white vinegar or lemon juice. Let it sit for about 5-10 minutes, and you’ll have a perfect buttermilk replacement for your festive red velvet holiday cake.
How do I store leftovers?
To keep your cake fresh, store any leftovers in an airtight container at room temperature for up to three days. If you’ve frosted the cake, it’s best to refrigerate it to maintain the cream cheese frosting’s consistency and taste.
Can I substitute any ingredients?
Certainly! You can use a gluten-free all-purpose flour blend instead of regular flour to cater to dietary needs. If you’re out of eggs, consider using a flaxseed meal mixed with water as a vegan alternative. Your festive red velvet holiday cake can still be delicious!
Why is my cake not red enough?
If your cake didn’t achieve that vibrant red hue, it might be due to the type of cocoa powder used. Always opt for high-quality Dutch-process cocoa, which enhances that beautiful red color. Also, ensure that you added enough food coloring, as it’s crucial for achieving that signature shade in a festive red velvet holiday cake.
Feel free to refer back to these tips as you whip up your next batch, and happy baking!
Conclusion on Festive Red Velvet Holiday Cake
The festive red velvet holiday cake has truly become a centerpiece in many holiday gatherings. With its vibrant hue and luscious cream cheese frosting, it embodies the spirit of celebration. Each slice reveals a soft, moist texture that leaves guests craving more, making it a perfect dessert for both intimate gatherings and large family feasts.
Remember, crafting this cake is not just about the ingredients—it’s about the memories created while baking. Feel free to customize it with your favorite decorations or flavor variations. So, gather your loved ones, and embark on this baking adventure! Enjoy a slice of joy this holiday season with your very own festive red velvet holiday cake.
Print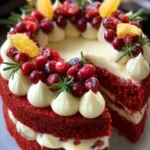
Festive Red Velvet Holiday Cake
- Total Time: 1 hour
- Yield: 10-12 servings 1x
- Diet: Vegetarian
Description
A delicious and festive red velvet cake perfect for holiday celebrations.
Ingredients
Scale
- 2 ½ cups all-purpose flour
- 1 ½ cups granulated sugar
- 1 teaspoon baking soda
- 1 teaspoon salt
- 1 teaspoon cocoa powder
- 1 ½ cups vegetable oil
- 1 cup buttermilk, room temperature
- 2 large eggs, room temperature
- 2 tablespoons red food coloring
- 1 teaspoon vanilla extract
- 1 teaspoon white vinegar
- 1 cup unsalted butter, softened
- 4 cups powdered sugar
- 16 oz cream cheese, softened
- 1 teaspoon vanilla extract
- Fresh strawberries, cherries, and other berries for garnish
- Edible gold accents or walnuts
- Rosemary sprigs for decoration
Instructions
-
Preheat Oven and Prepare Pans: Preheat your oven to 350°F (175°C). Grease and flour two 8-inch round cake pans.
-
Mix Dry Ingredients: In a medium bowl, whisk together the flour, sugar, baking soda, salt, and cocoa powder.
-
Mix Wet Ingredients: In a large bowl, combine the oil, buttermilk, eggs, food coloring, vanilla extract, and vinegar. Mix well.
-
Combine Mixtures: Gradually add the dry ingredients to the wet ingredients, mixing until just combined and the batter is smooth.
-
Bake the Cakes: Divide the batter evenly between the prepared cake pans. Bake for 25-30 minutes, or until a toothpick inserted into the center comes out clean. Allow cakes to cool in the pans for 10 minutes, then turn out onto wire racks to cool completely.
-
Prepare the Frosting: In a large bowl, beat the cream cheese and butter until smooth. Gradually add the powdered sugar, beating until light and fluffy. Stir in the vanilla extract.
-
Assemble the Cake: Place one cake layer on a serving plate. Spread a layer of frosting on top. Place the second cake layer over the frosting. Cover the entire cake with the remaining frosting.
-
Decorate: Decoratively pipe extra frosting along the top edge of the cake. Add fresh fruit, walnuts, rosemary sprigs, and edible gold accents as desired.
Notes
- Ensure all ingredients are at room temperature for the best mixing results.
- If you prefer more intense flavors, add a bit more cocoa powder.
- For clean and precise frosting, chill the cake layers in the fridge before assembling.
- Add a bit more buttermilk if batter seems too thick.
- For added texture, consider folding in some finely chopped nuts into the batter before baking.
- Prep Time: 20 minutes
- Cook Time: 30 minutes
- Category: Dessert
- Method: Baking
- Cuisine: American
Nutrition
- Serving Size: 1 slice
- Calories: 450
- Sugar: 40g
- Sodium: 400mg
- Fat: 20g
- Saturated Fat: 10g
- Unsaturated Fat: 7g
- Trans Fat: 0g
- Carbohydrates: 60g
- Fiber: 1g
- Protein: 5g
- Cholesterol: 85mg