Follow Me On Social Media!

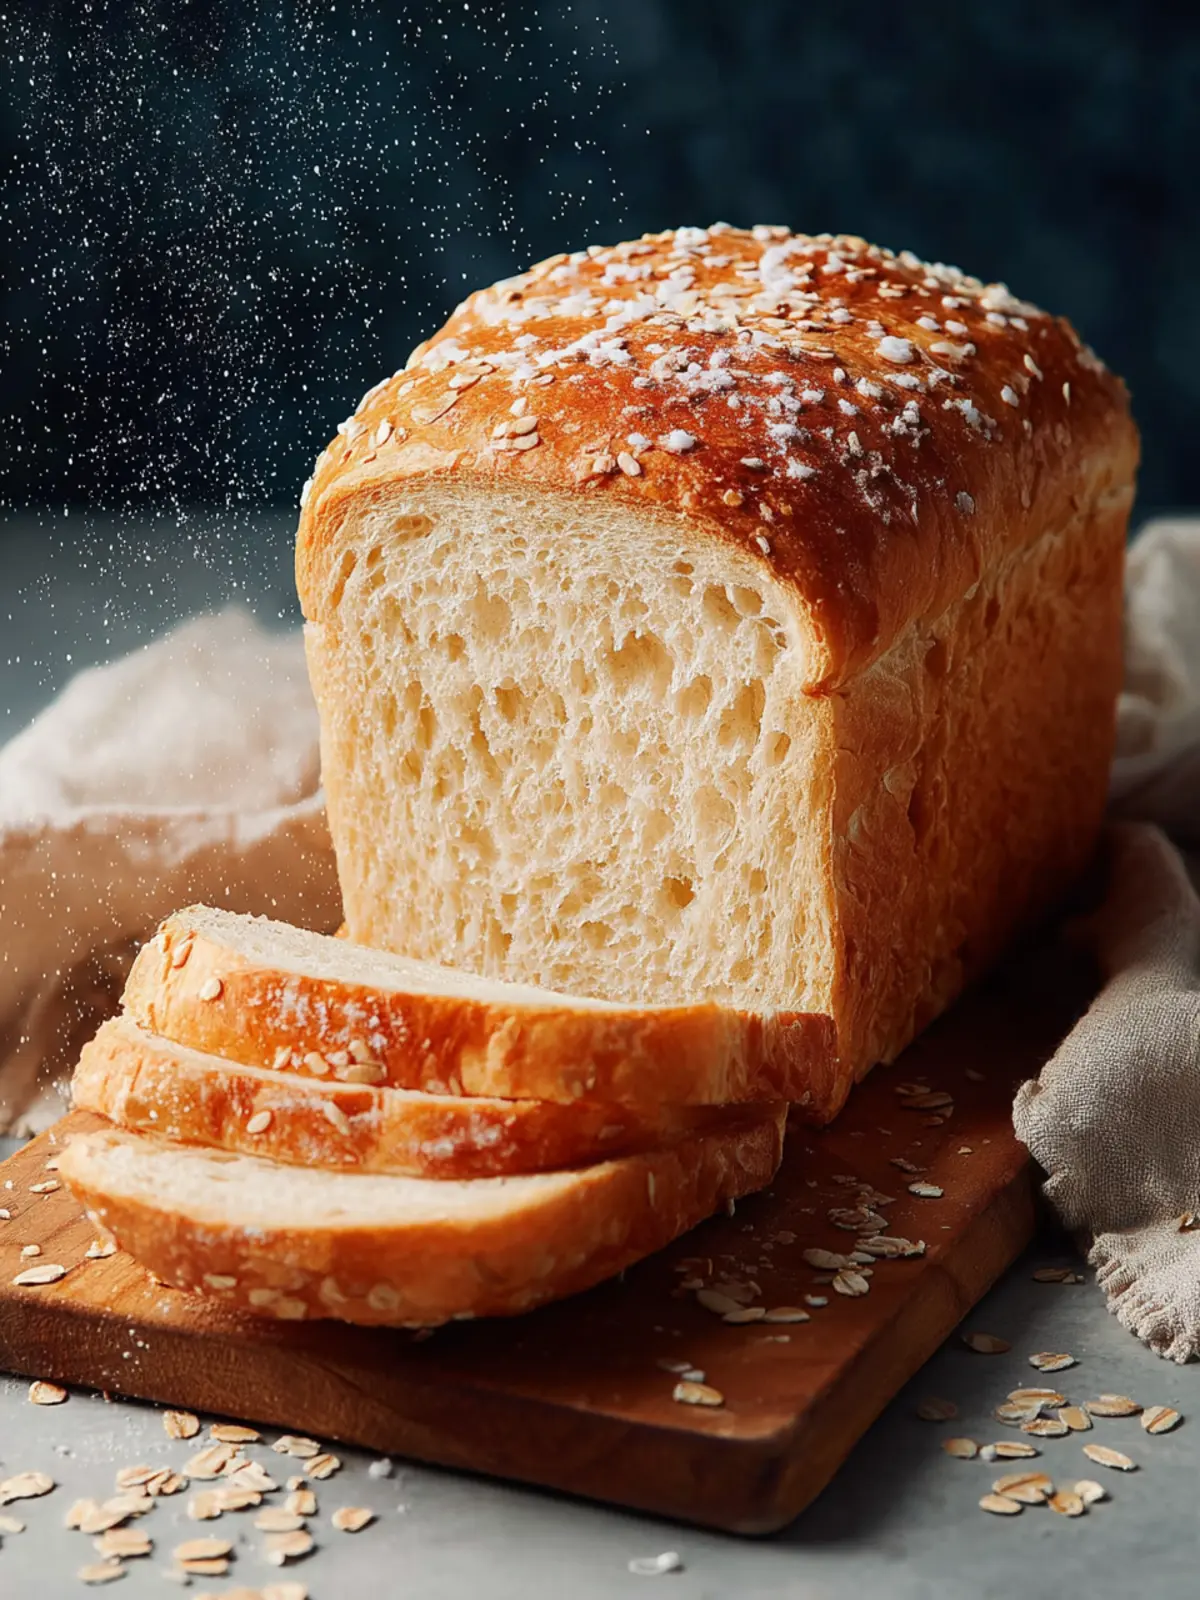
Soft and Fluffy Homemade Sandwich Bread: The Best Comfort Food
Introduction to Soft & Fluffy Homemade Sandwich Bread
Imagine opening your kitchen door to the inviting aroma of soft and fluffy homemade sandwich bread wafting through the air. There’s something irreplaceable about the smell of baking bread that instantly makes any house feel like a home. As you slice into the golden crust, the soft interior beckons, ready to cradle your favorite fillings. This delightful routine is not just about making bread; it’s about creating memories. Picture yourself crafting sandwiches filled with love—be it a classic PB&J for a quick lunch or a gourmet BLT to impress friends—all made possible by your very own hand-baked bread.
Why Homemade Sandwich Bread is a Game Changer
Let’s be honest: store-bought bread can sometimes leave much to be desired. It’s often packed with preservatives and artificial flavors, making it feel more like a mass-produced commodity than a personal experience. Enter soft and fluffy homemade sandwich bread, which takes the concept of sandwiches to an entirely new level.
-
Tailored Ingredients: By baking at home, you get to choose quality ingredients. Want to incorporate whole grain flour or honey? The power is in your hands.
-
Freshness is Key: Nothing beats the taste of bread fresh out of the oven. The moment you slice into your loaf, you’re greeted with a rustic warmth that store-bought options simply can’t replicate.
-
Healthier Alternatives: You can control the sugar, salt, and fat levels, tailoring it to your dietary needs or tastes. Whether you’re gluten-free, looking for a low-carb option or simply want to reduce sugar, making your own bread allows for customization.
-
Economical and Fun: Making bread at home can be surprisingly economical, especially if you bake in batches. Plus, it’s a fun and rewarding activity that transforms a simple kitchen task into a delightful experience.
As you prepare to embark on your journey into baking your own soft and fluffy homemade sandwich bread, remember that this is more than just a recipe. It’s an exploration of flavors, an understanding of techniques, and ultimately, a way to share love and care with each slice you serve.
Key Ingredients for Soft & Fluffy Homemade Sandwich Bread
Creating soft and fluffy homemade sandwich bread is truly an art that revolves around selecting the finest ingredients. It’s a labor of love that results in that perfect loaf, ready to elevate any meal!
-
Flour: The foundation of our bread, typically all-purpose or bread flour. Bread flour has a higher gluten content, which contributes to that delightful chewy texture. Don’t skimp on the quality here!
-
Yeast: Instant yeast works wonders for achieving a light and airy loaf. It requires no proofing, allowing for quicker preparation. Just stir it directly into the flour, and you’re on your way!
-
Water: Warm water activates the yeast, so aim for a temperature between 100°F and 110°F. This balance is essential for fermentation and achieving that perfect rise.
-
Sugar: A touch of sugar not only adds a hint of sweetness but also feeds the yeast, promoting a better rise and browning.
-
Butter: Adding softened butter enriches the dough, resulting in that coveted soft crumb and flavor.
-
Salt: Don’t forget salt! It enhances flavor and helps to regulate yeast activity to ensure a successful rise without overproofing.
These ingredients come together harmoniously to create that inviting loaf of soft and fluffy homemade sandwich bread that’s perfect for any occasion.
Why You’ll Love This Recipe
Creating soft and fluffy homemade sandwich bread is not just about baking; it’s about weaving comfort and warmth into your everyday meals. Imagine coming home after a long day and that magical aroma of freshly baked bread gently embraces you, instantly lifting your spirits. This recipe transforms a few simple ingredients into something extraordinary, making it perfect for any occasion, from a hearty breakfast toast to an elegant sandwich lunch.
-
Quality Ingredients: Each component, from flour to yeast, plays a pivotal role. The use of high-quality flour will yield a light and airy texture, while fresh yeast ensures that your bread rises beautifully.
-
Versatile Enjoyment: Picture the satisfaction of knowing you can use this bread for a myriad of delectable options—be it a classic PB&J, avocado toast, or even as a side for your favorite soup.
-
Healthier Option: When you make it at home, you control the ingredients, steering clear of the preservatives often found in store-bought varieties.
Not only are you indulging in the delightful process of baking, but you’re also creating lasting memories with loved ones as you share warm, sliced perfection straight from your kitchen. Who wouldn’t adore that?

Cooking Tips and Notes
Creating the soft and fluffy homemade sandwich bread of your dreams doesn’t have to be a daunting task. With a sprinkle of patience and a dash of attention to details, you too can master this delightful recipe. Here are some tips that will help ensure your bread turns out perfectly every time.
Choosing the Right Flour
Opt for unbleached all-purpose flour, as it has the right protein content to give your bread structure without making it too dense. If you have bread flour on hand, it can also work beautifully for a chewier texture.
Kneading Techniques
Proper kneading is key to achieving that soft and fluffy texture. Aim for at least 10 minutes of kneading; you want the dough to be smooth and elastic. If you’re unsure whether you’ve kneaded enough, use the “windowpane test.” Take a small piece of dough and stretch it thinly—if it holds without tearing, you’re good to go!
Rise Time Matters
Don’t rush the dough’s fermentation process. A longer rise allows for better flavor development. Look for a dough that has doubled in size—not just puffed up. Fluctuating temperatures can affect rising, so keep it in a warm spot, away from drafts.
Experiment with Add-Ins
Feel free to get creative! Adding herbs, cheese, or spices can enhance the flavor of your homemade sandwich bread and give your sandwiches a unique twist.
Remember, every oven is different, so keep an eye on your bread as it bakes. Enjoy the process, and soon you’ll be savoring homemade sandwiches that are truly unforgettable!
Serving Suggestions
There’s nothing quite like soft and fluffy homemade sandwich bread fresh from the oven. It’s versatile and pairs beautifully with a variety of fillings. Here are some ideas to elevate your sandwich game:
Classic Sandwiches
- Turkey & Avocado: Layer slices of turkey with creamy avocado, lettuce, and tomato for a nutritious lunch.
- BLT: Crispy bacon, fresh lettuce, and juicy tomatoes create a comforting classic that never disappoints.
Toast & Spreads
- French Toast: Use thick slices of the bread to whip up a delicious French toast. Serve with maple syrup and fresh berries for a delightful brunch.
- Avocado Toast: Mash a ripe avocado, season it with salt and pepper, and spread it generously on toasted slices. Top with red pepper flakes for a spicy kick!
Bread for Dipping
- Soup Companion: Slice the bread and serve it with a warm bowl of tomato soup; the fluffy texture makes it perfect for dipping.
- Bruschetta: Toast slices and top with a mix of diced tomatoes, garlic, basil, and balsamic vinegar for an easy appetizer.
Embrace the possibilities that soft and fluffy homemade sandwich bread brings to your kitchen, and watch it transform your meals!

Time Breakdown for Soft & Fluffy Homemade Sandwich Bread
Creating the perfect loaf of soft and fluffy homemade sandwich bread is not just a culinary task; it’s a delightful experience that you’ll savor with each slice. Understanding the timing can help you plan your baking day effectively.
Preparation Time
To kick things off, your soft and fluffy homemade sandwich bread begins with around 15-20 minutes of preparation. This includes gathering your ingredients, mixing them together, and forming your dough.
Proofing Time
Next, allow your dough to proof for about 1 hour. This is the magical phase where the yeast works its wonders, transforming your mixture into a light and airy dough. Make sure to cover it and keep it in a warm place for optimal results.
Baking Time
Once your dough is ready, the baking process takes roughly 30-35 minutes. The delightful aroma will fill your kitchen as the bread rises and turns golden brown.
Total Time
In total, you’re looking at approximately 1 hour and 50 minutes from start to finish. This includes preparation, proofing, and baking time. It may require a little patience, but the reward of delicious, soft, and fluffy homemade bread is worth every minute!
Nutritional Facts for Soft & Fluffy Homemade Sandwich Bread
Creating soft & fluffy homemade sandwich bread doesn’t just fill your kitchen with the comforting aroma of baking; it also results in a delightful addition to your meals. Let’s break down the nutritional composition to help you enjoy this bread with mindfulness.
Calories
Each slice of your soft and fluffy homemade sandwich bread contains approximately 120 calories. This makes it a great option for balanced meals without overloading your daily calorie intake.
Carbohydrates
With about 22 grams of carbohydrates per slice, this bread offers a substantial energy source, perfect for fueling your busy day or weekend adventures.
Fiber
You’ll find roughly 2 grams of fiber in each slice. While this might seem modest, it contributes to your daily fiber needs, aiding digestion while keeping you feeling satisfied and full.
Enjoy your baking journey, and relish in the goodness of homemade bread!
FAQs about Soft & Fluffy Homemade Sandwich Bread
When you dive into the delightful journey of making soft and fluffy homemade sandwich bread, questions are bound to arise as you experiment. Here are some common queries answered to help you master this comforting recipe.
Can I use different types of flour?
Absolutely! While all-purpose flour is the go-to for achieving that soft and fluffy texture, you can explore alternatives. Using bread flour can enhance the chewiness due to its higher protein content. If you’re leaning towards whole wheat flour, consider using a mix of half whole wheat and half all-purpose flour to balance flavor with texture. Just keep in mind that different flours may require slight adjustments in water or kneading times.
Why is my bread dense?
A dense loaf can be frustrating, especially when your goal is that lovely light texture. Here are a few reasons this might happen:
- Too much flour: If you added too much flour, it could weigh the bread down. Always measure carefully.
- Insufficient kneading: Proper gluten development is crucial—ensure you knead until smooth and elastic.
- Old yeast: Check the expiration date on your yeast; expired yeast can lead to poorly risen bread. Always activate it in warm water with sugar before mixing it in.
How should I store my homemade bread?
To keep your soft and fluffy homemade sandwich bread fresh, store it at room temperature in a bread box or a cloth bag to maintain moisture without trapping humidity. For longer storage, wrap it tightly in plastic wrap or aluminum foil and freeze it. Just remember, it’s best to slice it before freezing so you can take out just what you need later without defrosting the entire loaf.
Conclusion on Soft & Fluffy Homemade Sandwich Bread
Creating your own soft and fluffy homemade sandwich bread is a rewarding experience that brings the nostalgia of freshly baked bread into your kitchen. As you explore the delightful process, you’ll find that the gentle kneading and rising times aren’t just steps, but moments to savor. Picture the aroma wafting through your home as you pull a warm loaf out of the oven, ready for spreads or fillings.
Not only does this bread elevate your sandwiches, but it also opens the door to culinary creativity. So why wait? Embark on your baking journey today and enjoy the fluffy texture and soft crumb of this satisfying recipe. Your taste buds will thank you!
Print
Homemade Bread
- Total Time: 2 hours
- Yield: 1 loaf 1x
- Diet: Vegetarian
Description
This homemade bread is fluffy and delicious, perfect for sandwiches or toast.
Ingredients
Scale
- 3 tablespoons unsalted butter, melted
- ½ cup milk
- 2 tablespoons honey
- 2/3 cups warm water
- 2 teaspoons instant or active dry yeast
- 1/2 cup whole wheat flour
- 2 1/2 cups all purpose flour
- 1 ½ teaspoons kosher salt
- 2 tablespoons rolled oats, roughly chopped, for topping
Instructions
- In a small saucepan, melt the butter over low heat. Once melted, remove from the heat and stir in the milk so it is just warm.
- In the bowl of your stand mixer (or a large bowl), combine the melted butter and milk with the honey, warm water, and yeast and mix until just combined.
- In a separate bowl, stir together whole wheat flour, all purpose flour, and kosher salt.
- Add the dry ingredients to the wet ingredients and stir until just combined.
- Attach the dough hook to a stand mixer and start the mixer on medium-low speed. Allow the mixer to knead for 8 minutes (Alternatively: knead by hand for 8 minutes until the dough feels pillowy and has a smooth, stretchy exterior).
- Using floured hands, gently shape the dough into a boule (ball shape) by folding the dough under itself.
- Place the dough ball in a clean bowl and cover with a clean dish towel. Allow the dough to stand at room temperature for 1 hour, until risen and puffy.
- Grease an 8-inch or 9-inch loaf pan. Turn the dough onto a lightly floured counter and gently press it into a large rectangle about 1/2-inch thick. Roll the dough into a log and pinch the seams.
- Place the roll into the greased pan seam-side down and gently press to fill the shape of the pan.
- Cover the bread pan with a clean dish towel and allow to proof at room temperature for 1 hour, until risen and puffy.
- Preheat the oven to 350°F with the rack in the lower third of the oven.
- After the second rise, brush the top of the loaf with water and sprinkle the chopped oats on top if desired. Bake for 35 to 37 minutes.
- The bread is done when the top is golden brown and the inside reaches 190°F on an instant read thermometer. Remove the bread to a cooling rack and cool completely, at least 90 minutes.
- Once cooled, use a serrated knife to slice the bread. Store at room temperature for 3 to 5 days wrapped in plastic or freeze for 3 months.
Notes
- The dough can feel sticky; add a small amount of flour as needed while kneading.
- Cutting the bread while warm can ruin its texture.
- Prep Time: 30 minutes
- Cook Time: 37 minutes
- Category: Breads
- Method: Baking
- Cuisine: American
Nutrition
- Serving Size: 1 slice
- Calories: 150
- Sugar: 1g
- Sodium: 150mg
- Fat: 5g
- Saturated Fat: 3g
- Unsaturated Fat: 2g
- Trans Fat: 0g
- Carbohydrates: 24g
- Fiber: 1g
- Protein: 4g
- Cholesterol: 15mg